How to Create and Customize Your TapMo Digital Profile
Your TapMo digital profile brings your contact details, work, services, and ways to connect into one shareable card. The editor makes it easy to build: editing options sit on the left, while a live phone preview on the right shows how your changes look.
Get familiar with the editor
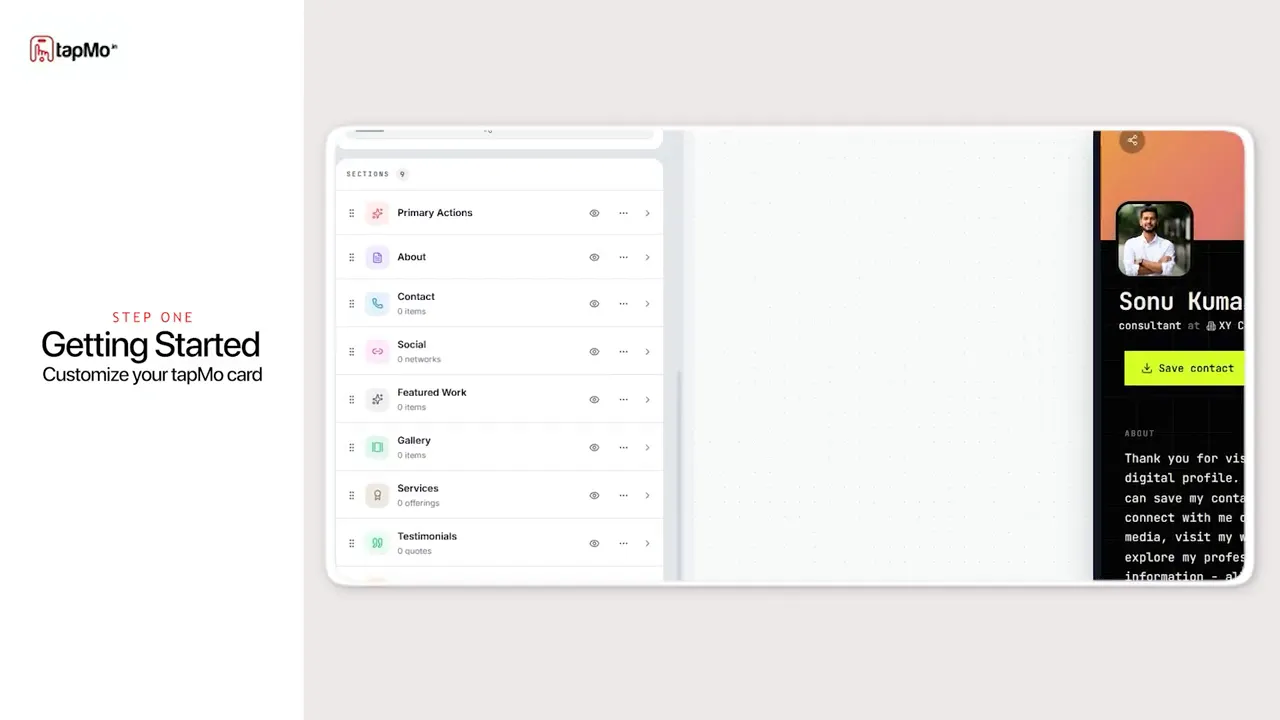
Start with three fixed blocks at the top: Identity for your personal and company details, Preset for the card’s overall visual style, and Hero for its opening layout. Beneath them is a reorderable list of nine sections: Primary Actions, About, Contact, Social, Featured Work, Gallery, Services, Testimonials, and Lead Form.
You do not have to finish every section before checking your progress. Save a change, then use the live preview to see how it appears on the card.
Set your identity and visual style
Update your identity
Open Identity and enter your full name, role, and company details. Save the changes and check the preview. These details tell people whose card they have opened, so get them right before you work on the design.
Choose a preset, wallpaper, and text style
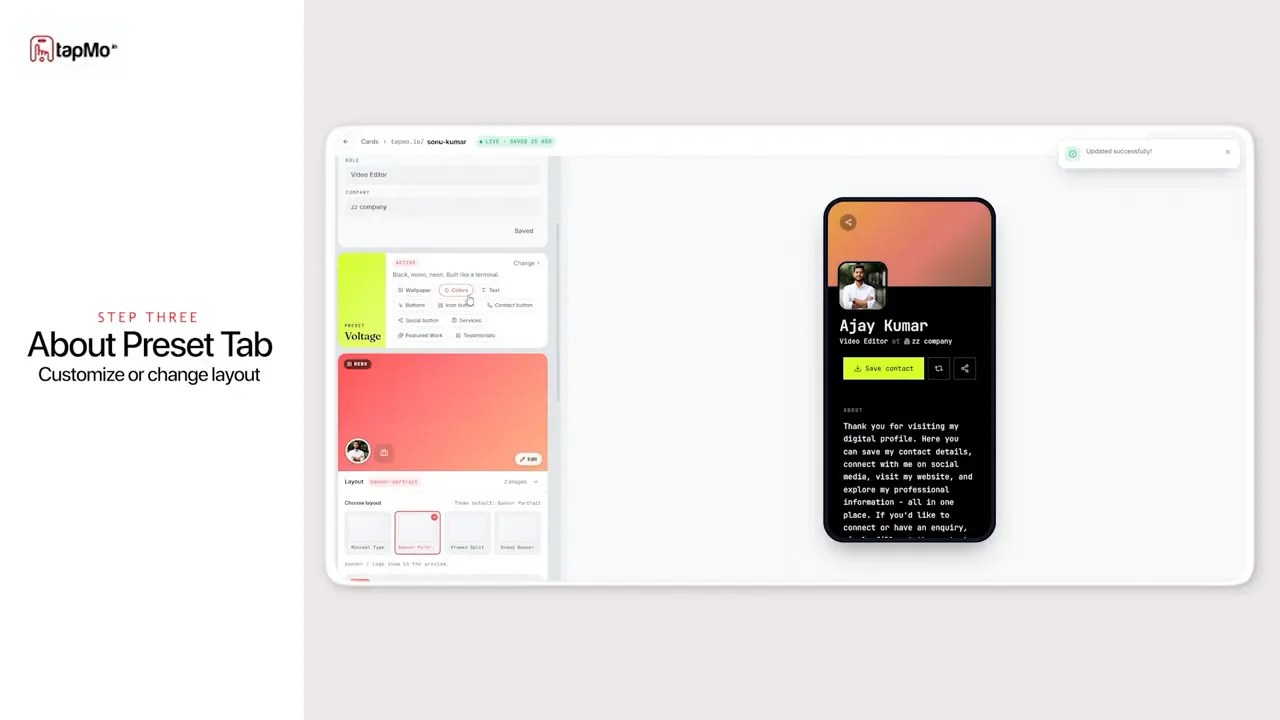
Preset gives you a quick starting point for the card’s visual language. From there, open Wallpaper and choose a fill, gradient, or blur. Adjust the color to suit your brand.
Next, use Colors and Text to select the background, button and title colors, and typography style. You can keep the result clean, make it bold, or give it a neon look. The best choice is the one that feels like you and keeps the card easy to read.
Pick a hero layout
Open Hero to choose how the top of your profile appears. A banner or portrait layout can give your card a different feel. Upload a banner image and company logo if you want to use them, or keep the fallback colors.
Make it easy for people to connect
In Primary Actions, keep Save Contact visible. Turn on Exchange so people can download your vCard, and keep Share active so they can pass along your profile link.
Then open About and write a short bio. Say who you are, what you do, and something that will help people remember you. Keep it clear and scannable on a phone, then save it.
To add a contact option, click Add Contact, choose a platform such as GitHub, and enter its title, subtitle, and full URL. For social accounts, open Social, click Add Social Link, select a network such as Viber, and enter your handle or number. Save each addition as you go.
Show your work and services
Featured Work is the place for a project you want people to notice. Upload a cover image, add a short title and description, and include a link if you have one. Save it, then use Gallery to add photos or videos of your best projects.
In Services, add a new service with a cover image, a clear title, and a brief description. Focus on what you do for the client. For example, a video editing service might explain that it turns raw footage into polished, engaging content.
Build trust and test your lead form
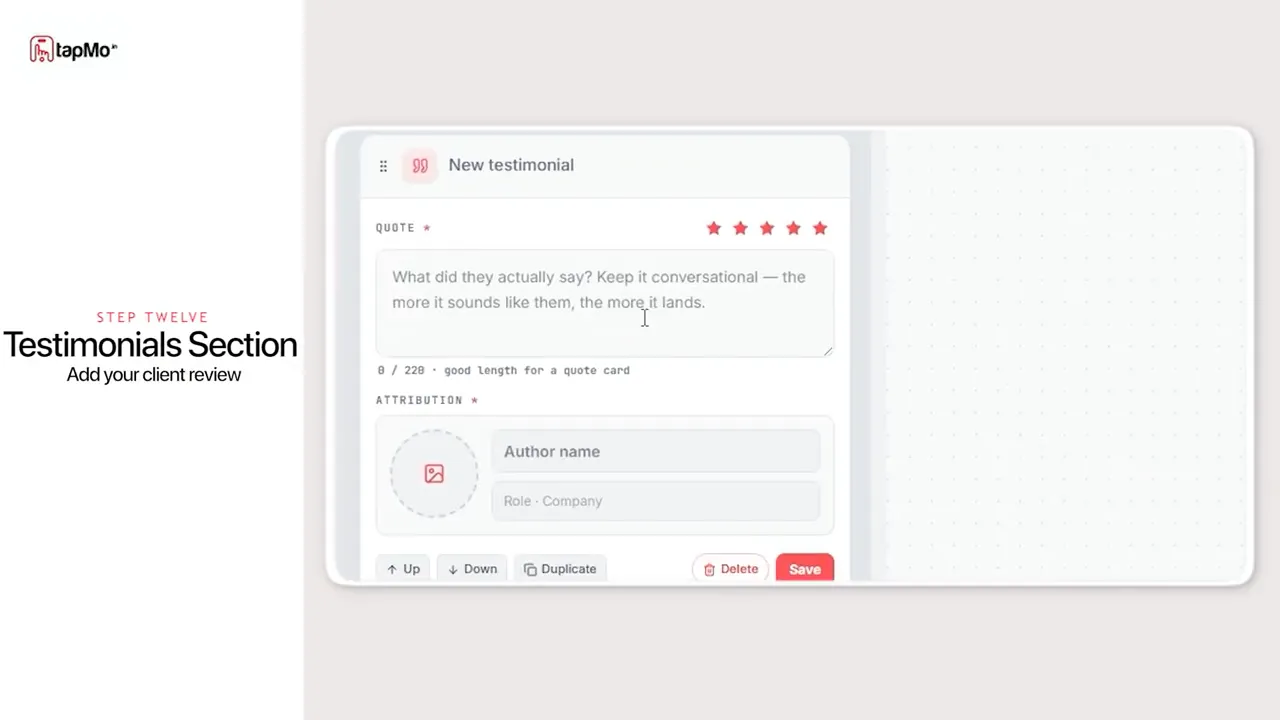
Testimonials give your work a human voice. Add a real client quote, select its star rating, enter the client’s name and role, and upload their photo before saving.
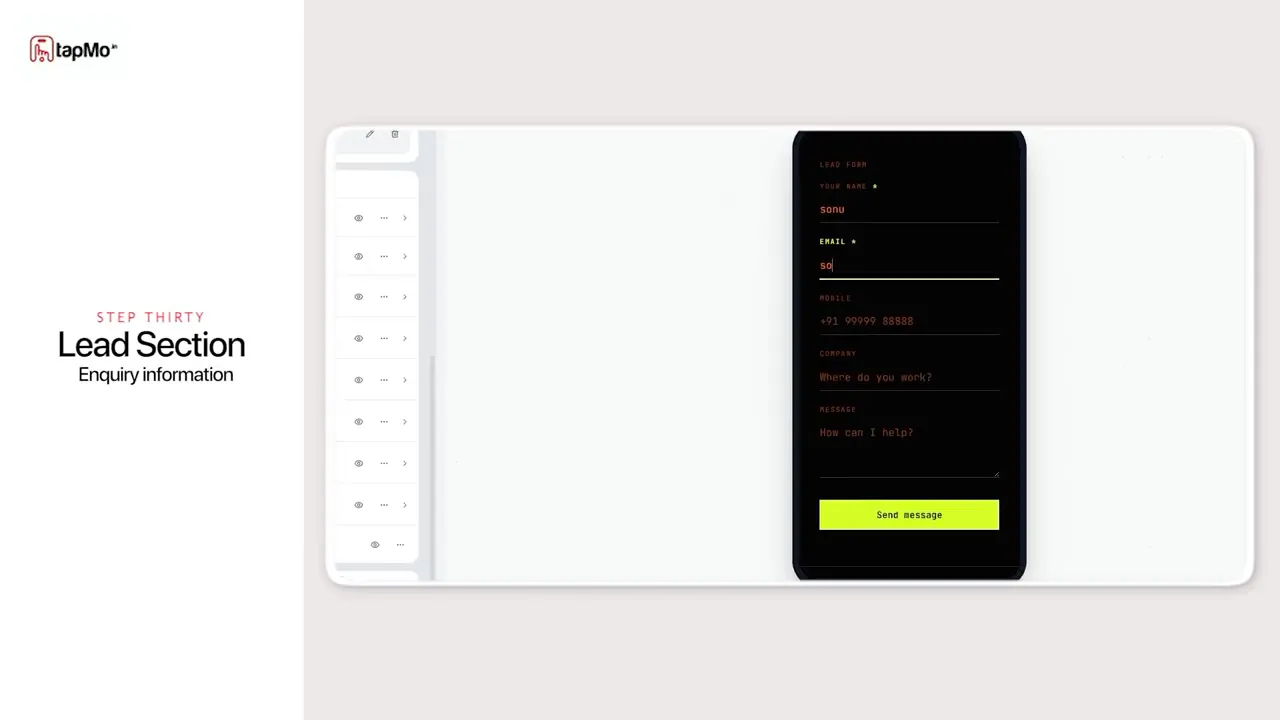
Finally, check that your Lead Form works. Enter a sample name, email address, mobile number, company, and message, then press Send Message to make sure the inquiry reaches you.
Once your details, design, and sections are in place, your digital card is ready to share with a single link or QR code. It is not a one-time setup, either. You can return to the editor and update your profile whenever your work or contact information changes.
How to Create a TapMo Digital Profile | Complete Step-by-Step Tutorial | NFC Card | Business Card